In an era where online privacy is constantly threatened by surveillance and censorship, securing our Internet connection has become essential. The decentralized virtual private network, or dVPN, offers an innovative solution to protect our online activity while allowing the monetization of unused bandwidth.
In this article, discover how to install your own dVPN node on a Raspberry Pi with dvpn-node-manager, a tool developed by Foxinodes in collaboration with Sentinel Growth DAO, for a secure, profitable, and accessible experience.
The Sentinel Network: Decentralized VPN
A decentralized virtual private network (dVPN) is a technology that expands and strengthens the concept of the traditional VPN through decentralization. Unlike classic VPNs, which direct Internet traffic through a limited number of centralized servers, the dVPN network uses a distributed network of many small servers, often operated by individuals. This structure significantly contributes to online privacy and resilience against censorship, as it eliminates a central point of control or failure.
The Sentinel project allows users to sell the unused bandwidth of their Internet connection. By hosting a dVPN node, you can not only enhance the security and privacy of other users but also profit from otherwise inactive resources. dVPN nodes can be installed in data centers, but the Sentinel project particularly encourages their installation at home to geographically disperse access points, thus increasing the overall resistance of the network to censorship and attacks.
Choosing a Raspberry Pi to host a dVPN node is particularly wise. These small devices are economical and consume very little energy, making them ideal for a project requiring continuous operation without incurring prohibitive energy costs.
What is dVPN Node Manager?
To facilitate the setup of such nodes, the dvpn-node-manager tool was developed to simplify the management of dVPN nodes by automating the installation and maintenance process. Operating entirely via command line, dvpn-node-manager allows users to easily configure, manage, and monitor their dVPN nodes directly from their terminal.
This tool is a direct response to the technical challenges that individuals wishing to participate in the Sentinel network might encounter without needing advanced computing skills. It offers users a valuable opportunity not only to enhance Internet security and privacy but also to participate in an innovative decentralized ecosystem, while generating passive income.
Hardware requirements
To install and run a dVPN node, you’ll need a device to host it and certain prerequisites regarding your Internet connection. Here is a detailed guide to choosing the right hardware and preparing your Internet connection.
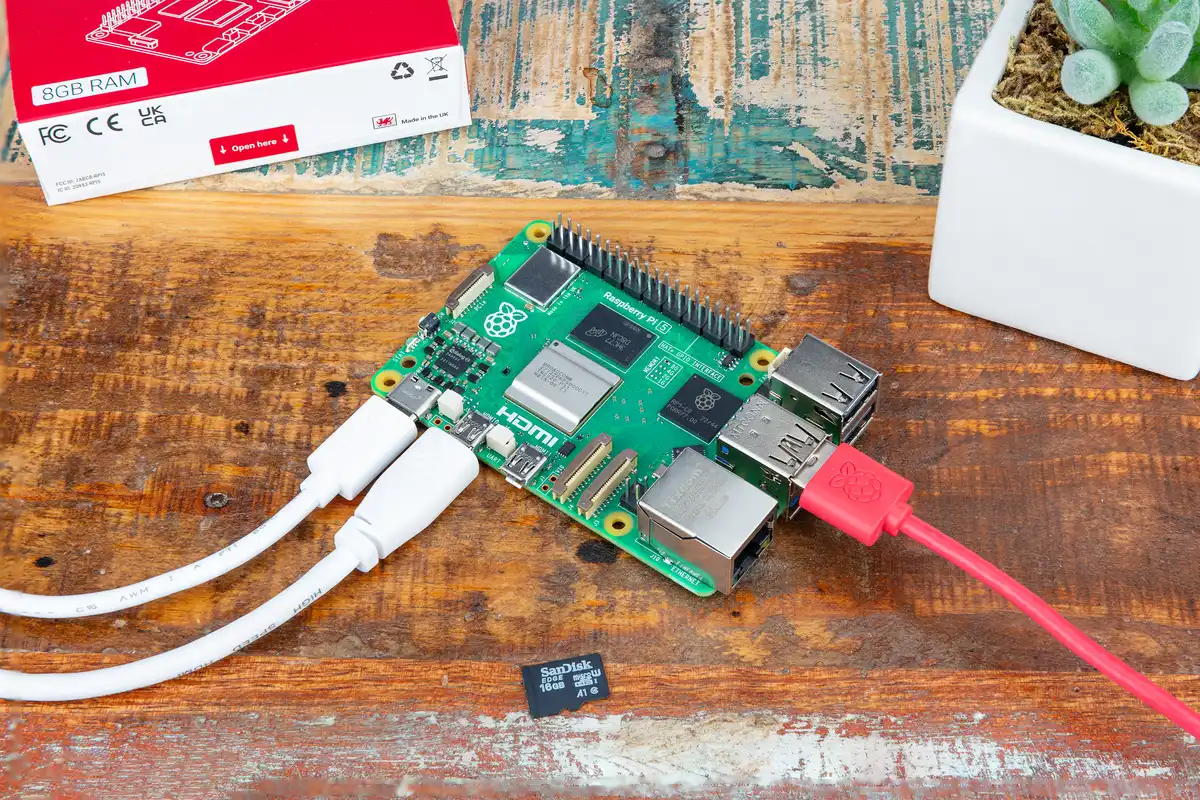
Raspberry Pi
The Raspberry Pi is a popular choice for this type of project due to its low power consumption and affordable cost, making it an ideal solution for selling bandwidth without incurring high costs.
Recommended Models
- Raspberry Pi 4 or 5: These models are particularly suited for managing a dVPN node due to their improved performance and ability to handle heavier workloads.
- Minimum Specifications: Choose a model with at least 1 GB of RAM, although 2 GB or more is preferable for better performance and system stability.
Power Supply and Accessories
- Ensure you have a reliable power source and the necessary cables to connect your Raspberry Pi. A stable power supply is crucial as the node must remain operational 24/7.
- It is not necessary to keep a monitor permanently connected to your Raspberry Pi. After initialization and setup, you can manage your device remotely via SSH.
Internet Connection
A stable internet connection is necessary for the proper functioning of a dVPN node, which must remain active and accessible continuously.
Connection Stability
- A wired (Ethernet) connection is strongly recommended for its stability and reliability. WiFi can be used, but it is less stable and may be subject to interference and bandwidth fluctuations.
- A high-speed Internet connection, ideally fiber optic, is preferable to support the incoming and outgoing traffic of the dVPN node. This ensures optimal throughput and an improved user experience for those connecting to your node.
Monitoring and Surveillance
- Periodic checks of the system’s status and logs can be performed remotely to ensure everything is functioning as expected.
- As we will see later, Sentinel offers a website to check the status of your nodes and to know if everything is operational.
By following these recommendations, you will be well-equipped to set up an effective dVPN node on a Raspberry Pi.
Operating System Installation
To transform your Raspberry Pi into a dVPN node, the first step is to choose and install the appropriate operating system. Raspberry Pi OS is the recommended option for most cases.
Choosing the Operating System
Raspberry Pi OS This operating system, officially developed by the Raspberry Pi Foundation, is optimized for various Raspberry Pi models. It is stable, widely supported, and regularly updated.
Using the Lite Version For a dVPN node, the Lite version of Raspberry Pi OS is ideal as it is lightweight and does not include a graphical interface. This saves system resources, which helps maintain good node performance. However, if you prefer a graphical interface, the full version remains a viable option, and you can still configure the system using a terminal or via SSH.
Operating System Installation
Follow these steps to install Raspberry Pi OS on your SD card:
- Software Download
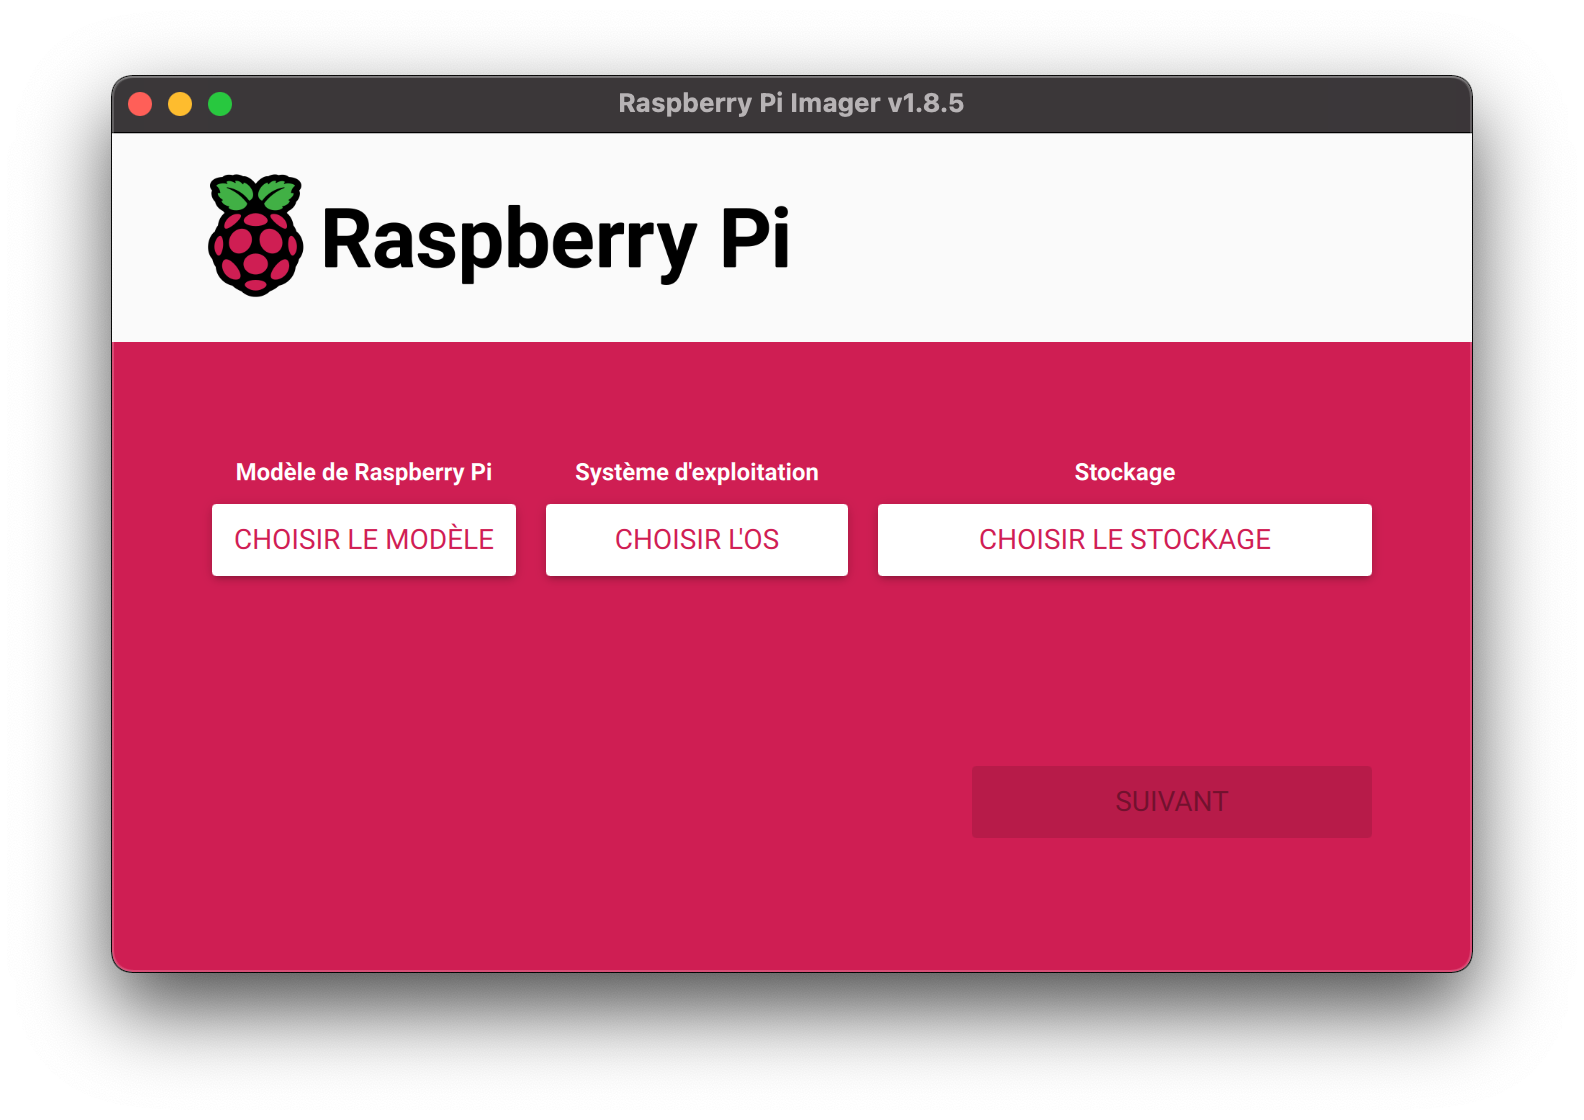
Visit the official Raspberry Pi website and download the Raspberry Pi Imager.
- Preparing the SD Card
Insert the SD card into your computer’s card reader and launch Raspberry Pi Imager. - Setting up the Installation:
- In the Raspberry Pi Imager interface, select the model of your Raspberry Pi.
- Choose “Raspberry Pi OS (64-bit Lite)” as the operating system.
- Select the SD card on which you want to install the system. - Customizing the Installation:
- Click “next” to access the customization options.
- Press “Edit Settings” to configure advanced settings. - In the “General” tab
- Enter a hostname for your device, useful for finding it on your network.
- Set the username and password to secure access.
- Configure Wi-Fi, if necessary, for a wireless connection. - In the “Services” tab
Enable SSH to allow remote management, and if you wish, add your public SSH key. - In the “Options” tab
Check “Eject media when finished” for a clean installation end. - Starting the Installation:
After saving your settings, click “Yes” to begin writing the system to the SD card. The installation process may take a few minutes. Once complete, a message will appear inviting you to remove the SD card. - Booting the Raspberry Pi:
Insert the SD card into your Raspberry Pi and plug it in to start it up.
By following these steps, you will have successfully installed Raspberry Pi OS on your Raspberry Pi, thus preparing it for the installation of dvpn-node-manager.
Raspberry Pi Preparation
Before using the Raspberry Pi as a dVPN node, proper preparation is crucial. This preparation includes the initial setup of the device and implementing basic security measures to ensure your node operates efficiently and securely.
Initial Setup
After installing the operating system on the SD card, follow these steps to start and configure your Raspberry Pi:
Starting the Raspberry Pi:
- Insert the SD card containing the operating system into the Raspberry Pi.
- Connect your Raspberry Pi to a power source to boot it up.
Network Connection:
- Connect your Raspberry Pi to your local network via an Ethernet cable. This ensures a stable connection during the installation and operation of the dVPN node.
- Access your router’s management interface, often accessible through an address like
192.168.1.1or192.168.0.1. Look for the DHCP section to find the IP address assigned to your Raspberry Pi.
Accessing the Raspberry Pi via SSH:
Open a terminal on your computer and connect to your Raspberry Pi via SSH using the following command:
ssh username@ip_addressReplace username with the default username (pi for Raspberry Pi OS) and ip_address with the previously found IP address. If it's your first time connecting, you might be asked to verify the machine's fingerprint.
Securing the Raspberry Pi
To secure your freshly installed Raspberry Pi, proceed to update the packages and the system:
sudo apt update && sudo apt upgrade -yThese commands will download and install the available updates for your operating system.
By following these steps, you have prepared your Raspberry Pi and can now proceed with the installation of dvpn-node-manager and the configuration of your dVPN node.
Installation of dvpn-node-manager
Add the PPA Repository
To install the dVPN node manager on your Raspberry Pi, you’ll need to add the PPA (Personal Package Archive) to your system’s software sources.
Instead of editing the sources.list file manually, you can use the following commands to automatically add the necessary repository lines.
echo "deb http://ppa.launchpad.net/foxinou/dvpn-node-manager/ubuntu jammy main" | sudo tee -a /etc/apt/sources.list
echo "deb-src http://ppa.launchpad.net/foxinou/dvpn-node-manager/ubuntu jammy main" | sudo tee -a /etc/apt/sources.list
This method ensures that the source for the dVPN node manager, specifically for Ubuntu-based distributions like jammy, is included in your system's package sources. This command appends the necessary lines to your sources.list file without needing to manually edit it, simplifying the process.
Add the PPA Key
To ensure the authenticity of the downloaded packages, add the PPA’s GPG key using the following commands:
gpg --keyserver keyserver.ubuntu.com --recv-keys 1E4DCBDC436F95468F1FEB793B604A1F5EE3D8E5 && gpg --export 1E4DCBDC436F95468F1FEB793B604A1F5EE3D8E5 | sudo tee /etc/apt/trusted.gpg.d/foxinou_dvpn-node-manager.gpg > /dev/nullUpdate your packages and Install dvpn-node-manager
Now that your source has been added and the GPG key installed, update your package list and install the dVPN node manager with:
sudo apt update
sudo apt install dvpn-node-manager
These steps will install the dvpn-node-manager on your Raspberry Pi.
Now all you need to do is start the installation of your node with the following command:
sudo dvpn-node-manager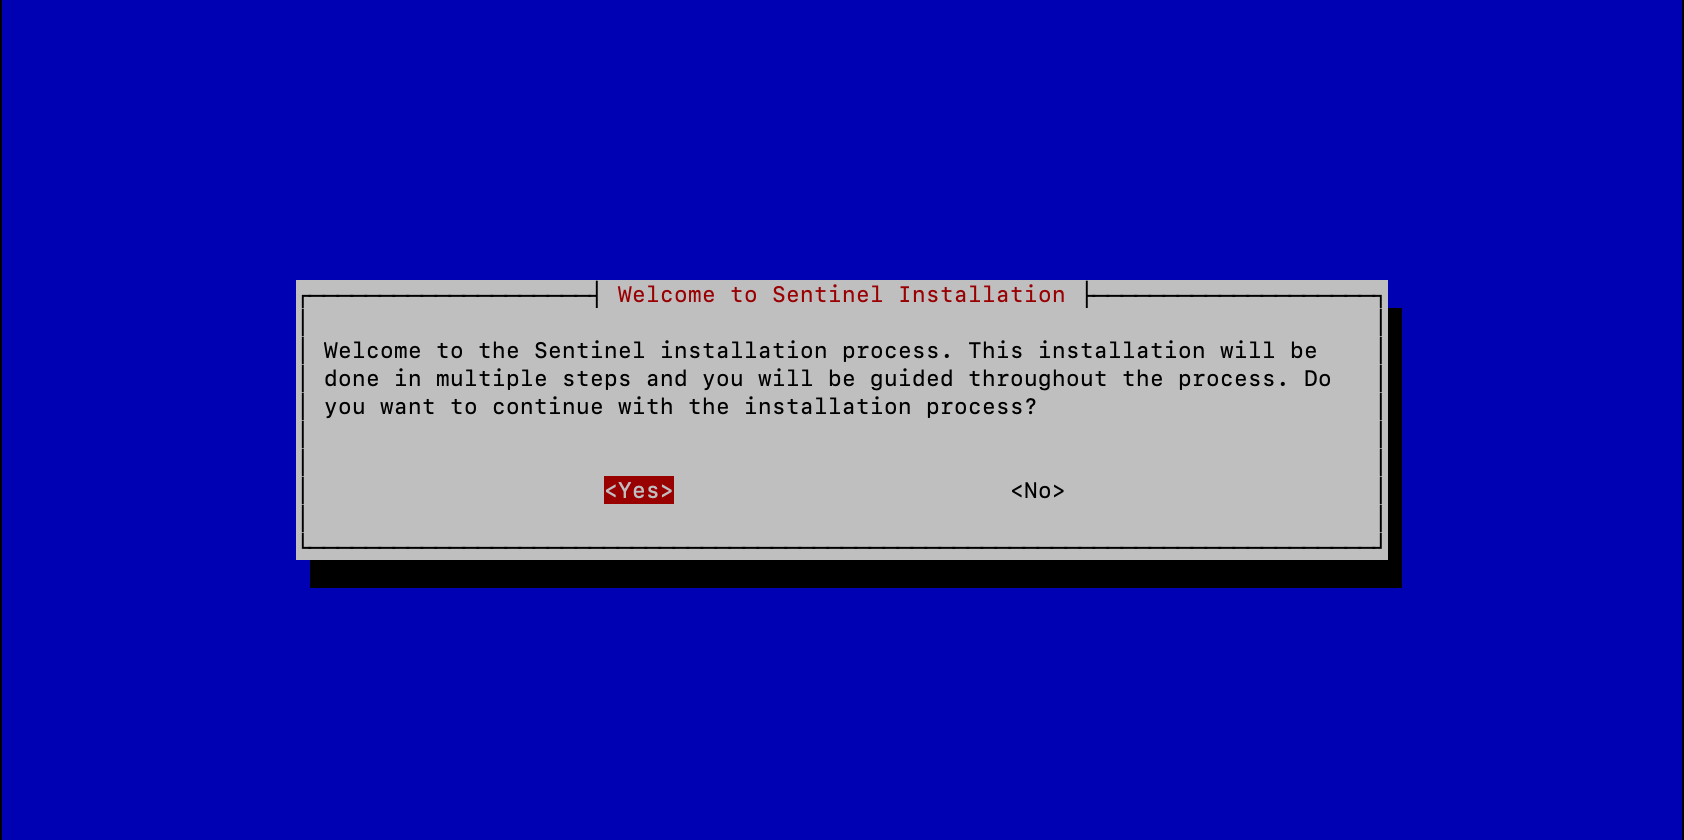
Configuration of the dVPN Node
Initial Installation
Following the installation of necessary dependencies, an installation assistant will guide you through the setup of your dVPN node and crypto wallet.
Node Configuration
You will need to provide specific information to configure your dVPN node:
- Define the Moniker: Enter a name that will be visible to those wishing to rent bandwidth from your node.
- Node Type: Select “residential” as it is suited for non-data center environments.
- VPN Type: Choose between Wireguard and V2Ray according to your needs.
- Public IP: Check and enter the pre-filled public IP address of your internet connection.
- Connection Ports: Ports will be assigned randomly, with an option to automate the opening in your firewall. You can change these values before installing the node.
Wallet Configuration
Essential for managing transactions on the Sentinel blockchain and receiving user payments:
- Restoring an Existing Wallet: Use this if you already have a mnemonic phrase for a wallet for your node.
- Creating a New Wallet: Otherwise, a new wallet will be created. Be sure to carefully note the provided mnemonic phrase for restoration in case of reinstallation.
Account Balance Check
The installation assistant will ensure that your wallet contains at least 10 DVPN before starting the node. You cannot proceed with this step without having transferred tokens to the node’s wallet.
NAT Configuration
Follow the displayed instructions to configure NAT on your router, involving opening the necessary ports and redirecting traffic to your Raspberry Pi.
Testing Node Access from the Internet
As the final step of installation, a test on the accessibility of your node via the Internet will be conducted. Adjust settings if necessary and repeat the test until your node is accessible from the Internet.
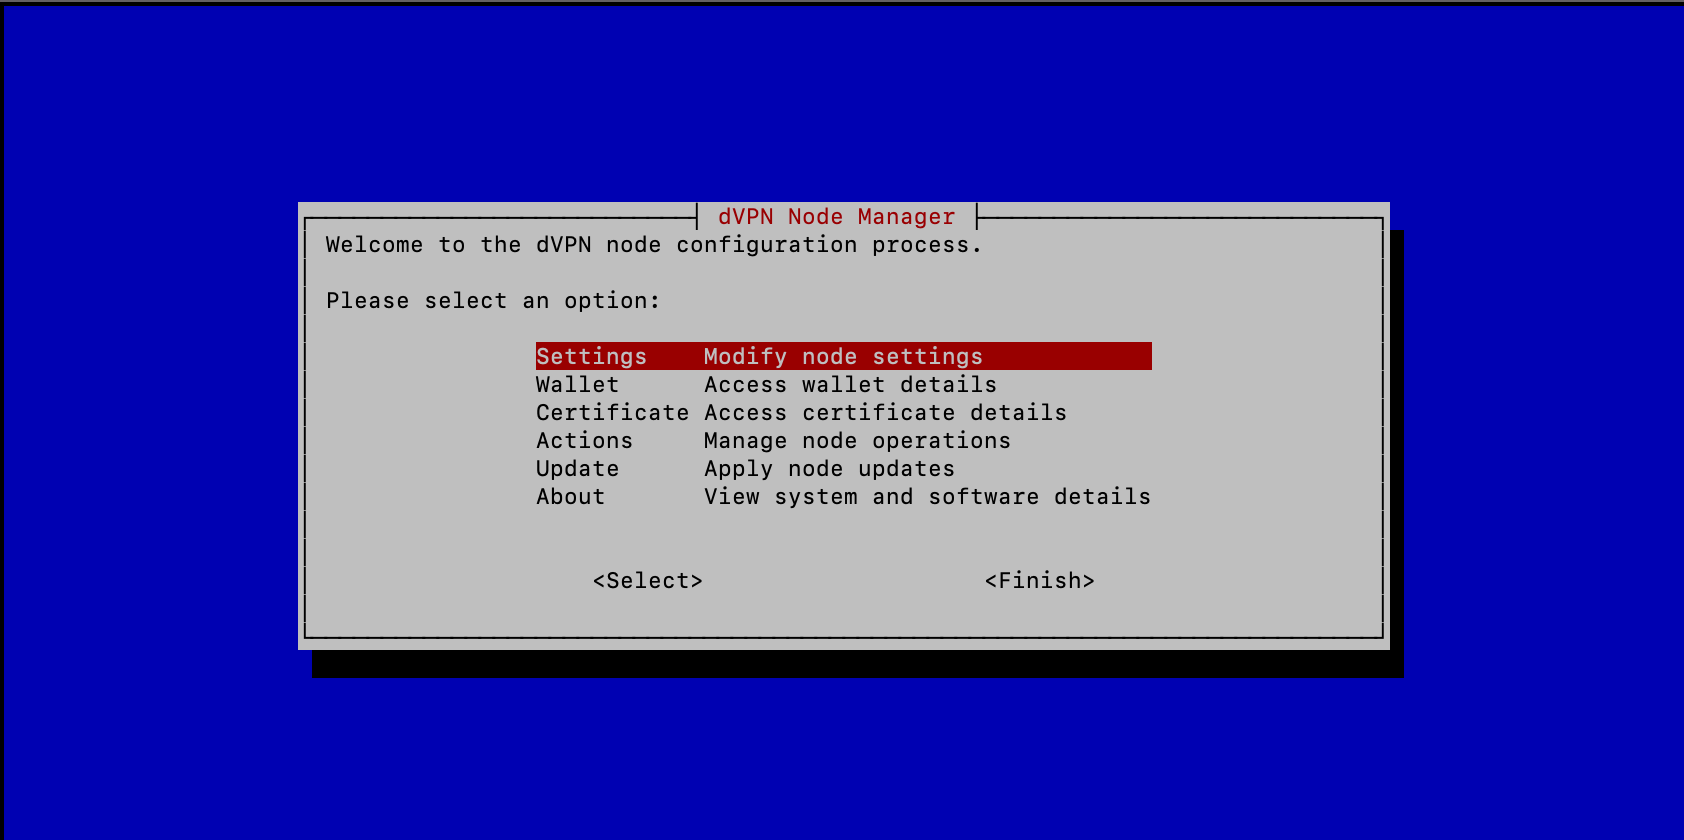
Node Management
If your dVPN node is already installed, starting dvpn-node-manager will give you access to various management options:
- Wallet Information: View details of the wallet associated with the node.
- Node and VPN Configuration: Adjust various settings as needed.
- SSL Certificate Information and Renewal: Check and renew your SSL certificate to maintain security.
- Node Maintenance: Perform tasks such as restarting, shutting down, uninstalling, or updating.
These steps will enable you to efficiently configure and manage your dVPN node on a Raspberry Pi, thereby optimizing connection security and generating passive income through the sale of excess bandwidth.
Conclusion
Throughout this article, we have extensively explored how to set up a dVPN node on a Raspberry Pi using the dvpn-node-manager tool. We covered steps from the initial operating system installation, securing the Raspberry Pi, to the detailed configuration of the node and its wallet.
By participating in the Sentinel dVPN network, not only do you contribute to a more open and secure internet, but you also have the opportunity to monetize unused bandwidth, thus enhancing the decentralization and resilience of the network against censorship.
For further assistance or to deepen your knowledge, numerous resources are available:
- Official Documentation: For detailed instructions on setting up a dVPN node, consult the Sentinel Node Setup Docs.
- Node Statistics: To monitor your node’s statistics, visit Sentinel Node Statistics.
- Community and Support: Join discussions and find support on:
- Telegram: Sentinel Node Network for real-time discussions with other node users.
- Discord: Sentinel Discord, particularly the #dvpn-nodes channel, to share your experiences and receive expert advice.
These platforms provide an excellent way to stay connected with the community, share your experiences, obtain expert advice, and stay informed about the latest updates and improvements in the Sentinel network.
About Foxinodes
This article is written by Foxinodes, a validator in the Cosmos ecosystem committed to simplifying access to blockchain for everyone and actively contributing to educational articles like this one.
Medium | Website | Discord | Telegram | X
Join Our Journey
At dVPN.news every member of the Sentinel community is a contributor. Whether you're writing articles, sharing tutorials, or participating in discussions, your involvement is what drives our collective growth, and best of all it's rewarded! Together, so if you to contribute to the growth of the Sentinel Network, you are in the right place!
Connect with Us
Stay in touch and be part of our growing community:
- Follow Sentinel on (Twitter)
- Follow The Growth DAO on (Twitter)
- Join The Growth DAO community Telegram Group
If you can be told what you can see or read online, then it follows that you can be told what to say or think; you need a Sentinel to defend your digital sovereignty because no one else will do it for you!